Swiftで画像アプリ(その5)〜セル間隔調整、サムネ画像表示
前回はセルサイズを指定したが、今回はセル間隔を指定して綺麗に並べる。
セル間隔の指定はmain.storyboardのプロパティ設定から。
Collection ViewのMin SpacingにおけるFor Cells(横のセルとの間隔)とFor Lines(縦の行の間隔)で設定。

さらにセルサイズを微調整。
// セルの大きさを指定
func collectionView(_ collectionView: UICollectionView, layout collectionViewLayout: UICollectionViewLayout, sizeForItemAt indexPath: IndexPath) -> CGSize {
let cellSize: CGFloat = view.frame.size.width/3-2
return CGSize(width: cellSize, height: cellSize)
}
セルサイズをframe/3-2として一行につき-6の余白、For Cellsでセル間隔を3 にしてぴったり、かな?
For LinesはFor Cellsとの設定の違いを明確に確認するため大きめの50。
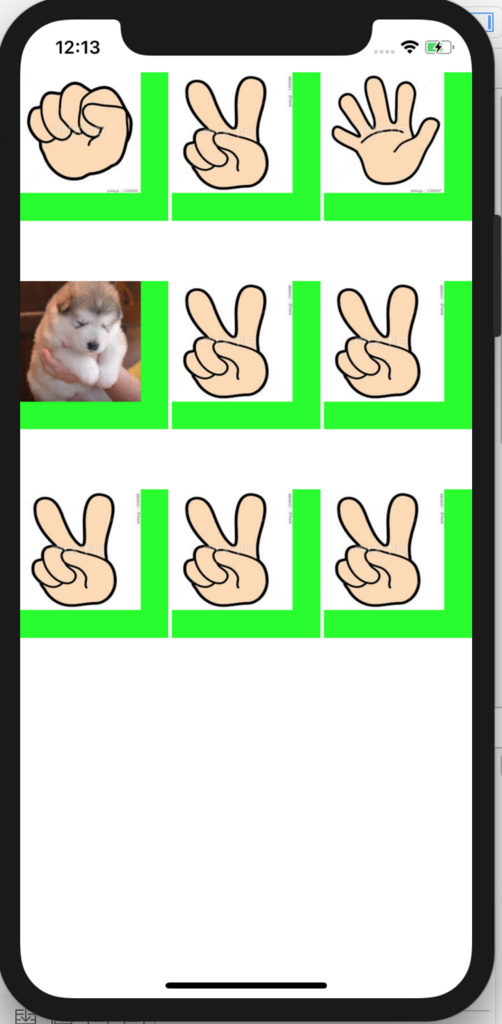
さらに各セルに画像表示もしてみる。
Assets.xcassetsに適当に画像を9枚 01〜09pic.jpgを格納。
Main.storyboardでCollection Viewのセル内にImage Viewを配置し、プロパティでタグ番号を1に設定。

タグ番号を使用した画像表示のコードを書く。
// 画像ファイル名を配列で登録
let photos = ["01", "02", "03", "04", "05", "06", "07", "08", "09"]
// データを返す
func collectionView(_ collectionView: UICollectionView, cellForItemAt indexPath: IndexPath)-> UICollectionViewCell
{
let cell = collectionView.dequeueReusableCell(withReuseIdentifier: "testCell", for: indexPath) as UICollectionViewCell
cell.backgroundColor = UIColor.green // とりあえず緑にして動作確認
// indexに応じたサムネイル画像を表示
let imageView = cell.contentView.viewWithTag(1) as! UIImageView
imageView.image = UIImage(named: photos[indexPath.row])
return cell
}

セルサイズと画像サイズが合ってないけど、とりあえずサムネ表示の元ができた。
MyPicApp-004